Calendar Integration
iStudiez Pro Calendar Integration feature allows you:
- A) seeing events from external calendars in iStudiez Pro and
- B) sharing iStudiez Pro schedule to external calendars.
Let’s see how you can easily set up both options as well as handle troubleshooting issues.
OPTION A – See events from external calendars in iStudiez Pro
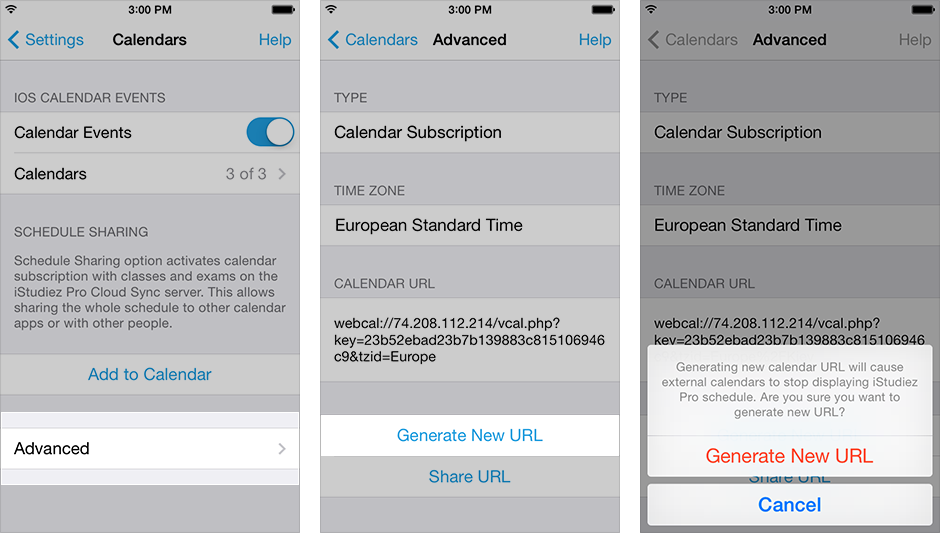
Launch iStudiez Pro > Settings > Calendars and check calendars you want to be shown in iStudiez Pro:
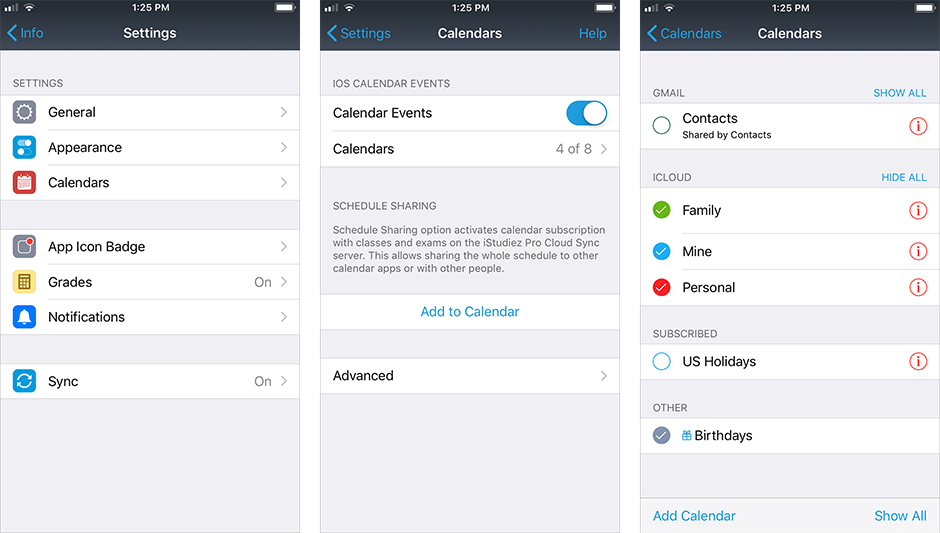
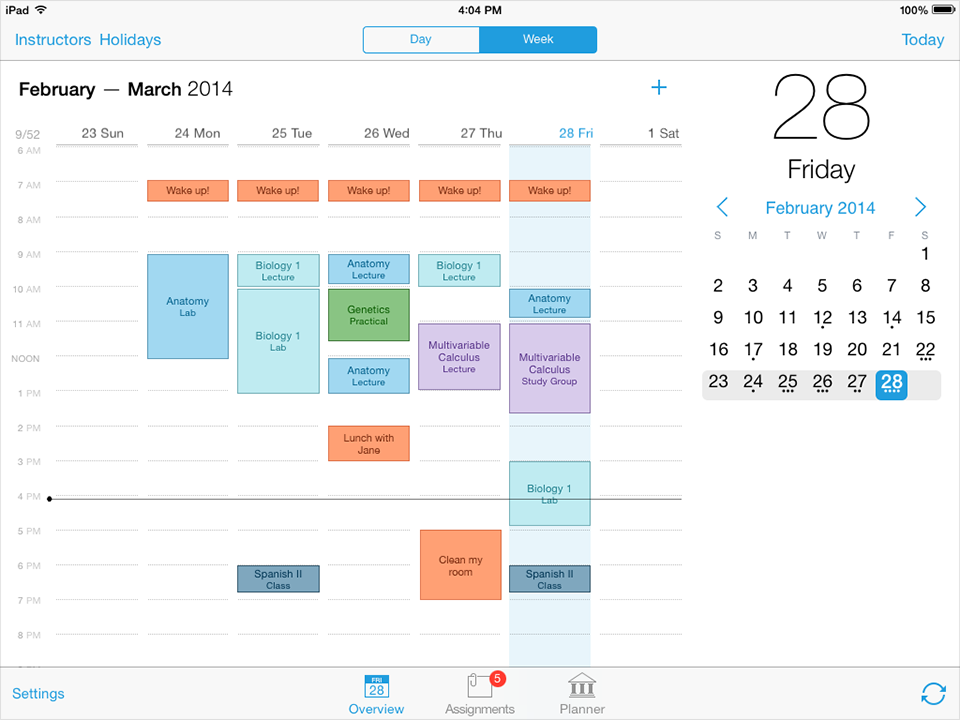
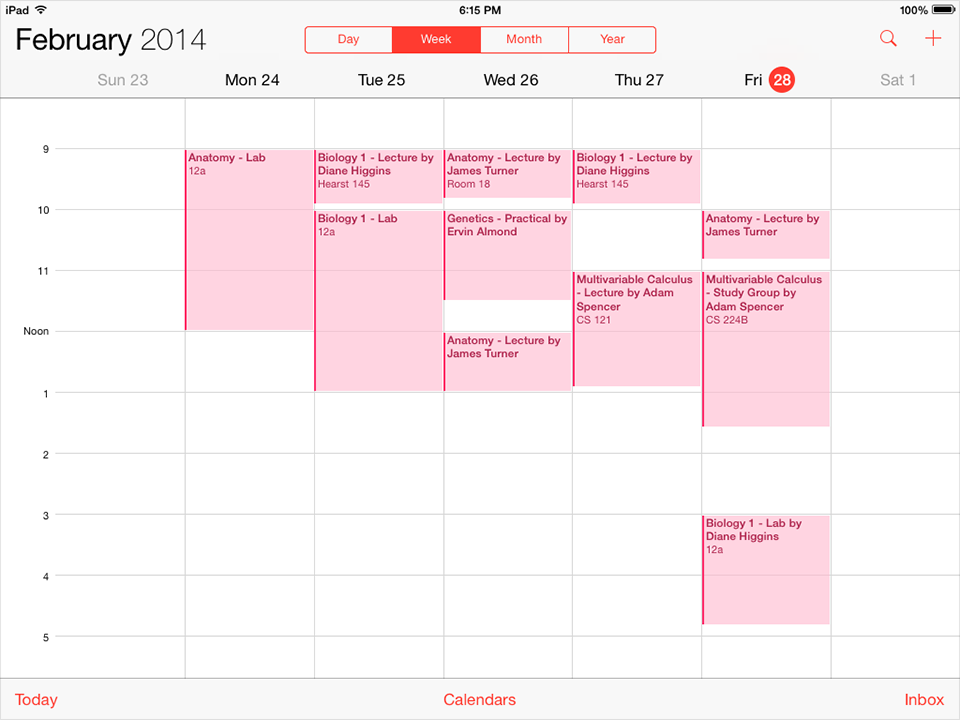
As a result, events from these calendars will appear next to iStudiez Pro schedule events in the app (see the Week pane example below):
OPTION B – Share your iStudiez Pro schedule to external calendars
You can export iStudiez Pro schedule events to any third-party calendar. This works by creating and sharing the link to the particular subscription calendar that is created and stored within iStudiez Pro Cloud Server (naturally, your Cloud Sync account should be active when creating the link). Once the link is added to the external calendar, your iStudiez Pro schedule will be exported to that calendar and will be automatically refreshed when you add or change anything within the app.
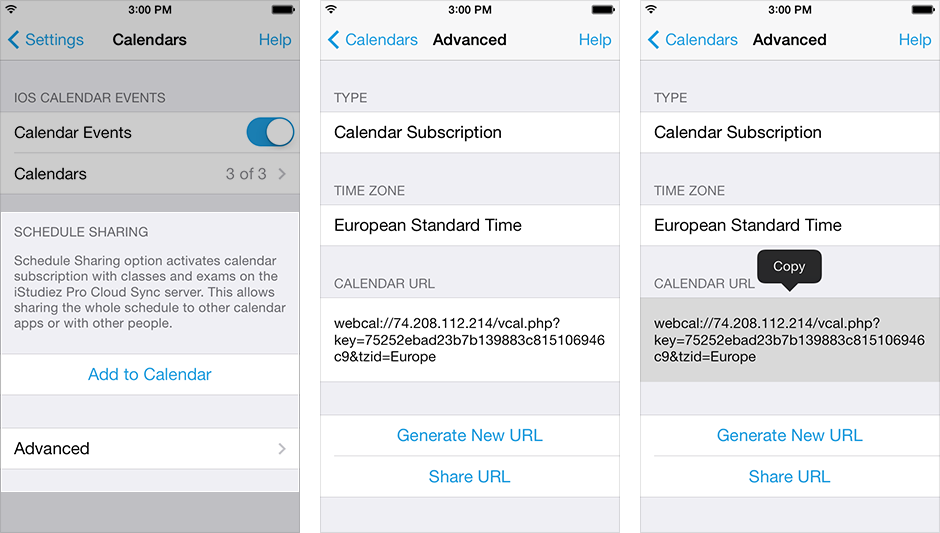
Tapping "Advanced" button will reveal additional information about the subscription calendar and the link itself. The link can be copied to any third-party calendar. In order to add the link to OS X Calendar app just tap "Add to Calendar" button.
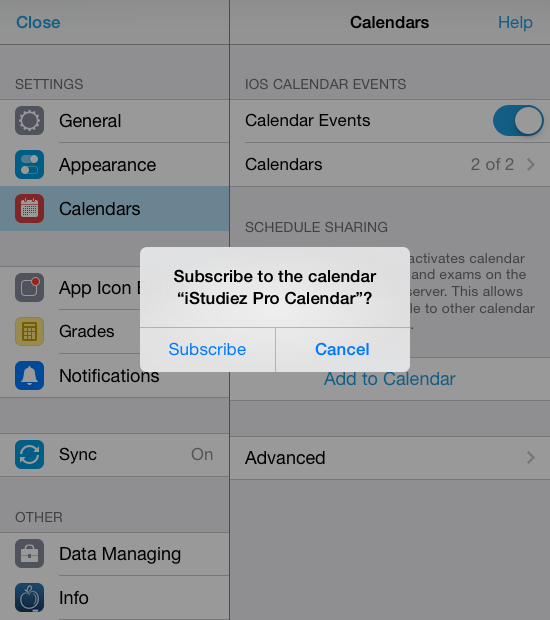
After you tap "Add to Calendar" button you will be asked if you want to subscribe to the new calendar. Tap "Subscribe" button.
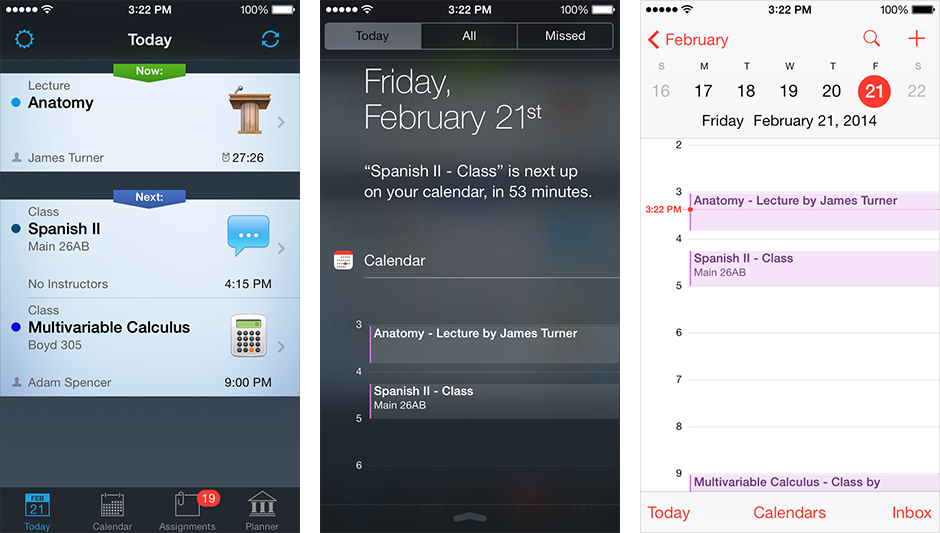
iStudiez Pro schedule will appear in the Calendar app as it is shown below. It is important to understand that all classes and exams from iStudiez Pro will only be exported as read-only events. Any changes you want to make will need to be done in iStudiez Pro only. This means that you don’t need to worry that you friend to whom you shared your schedule will make changes to it or delete it occasionally.
- ATTN:
- Many third-party calendars refresh their data once in several hours or more sparsely. So, if you recently made changes to your schedule in iStudiez Pro and you don’t see them refreshed in a third-party calendar, just refresh that calendar manually.
If anything went wrong
It is possible that you do not see "Add to Calendar" button. If you see the warning message as shown on the screenshot below, that means your sync option is switched off or you are not logged into your Cloud Sync account. Schedule sharing requires your iStudiez Pro Cloud Sync account to be switched on and active.
To activate your Cloud Sync account go to Sync section, switch ON the Cloud Sync option and follow instructions. After completing the activation go back to Calendars and tap "Add to Calendar" button.

Switching OFF schedule sharing option
If you wish your shared schedule to stop showing in third-party calendars follow these steps: launch iStudiez Pro > Settings > Calendars and tap "Advanced" button. Then tap "Generate New URL". As a result the new link to subscription calendar will be generated and the old link will stop working for any third-party calendars.
- P.S.
- If you followed all the steps and you still face the issue, please contact our support team at support@istudentpro.com