

Cloud Sync
 Cloud Sync option allows you sharing iStudiez Pro data on all your iOS devices automatically, without using data backup or entering same data several times on your iPhone/iPod Touch and iPad.
Using Cloud Sync option saves all your data on a Cloud Sync Server of iStudiez Pro. To put it simple, imagine that you are in school and need to add some homework or schedule details to iStudiez Pro on your iPhone. Once you entered necessary information, you sync to the Cloud Sync Server to save your records. Later at home when you need to have same data reflected in iStudiez Pro on your iPad you simply tap Sync button and all the new data entered previously on iPhone will be loaded from Cloud Sync Server to your iPad.
Here we explain how to set up and start using Cloud Sync option.
1. Switch on Cloud Sync option in iStudiez Pro settings
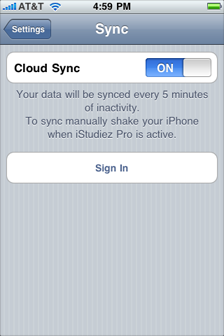
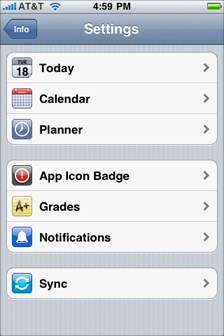
Cloud Sync option is switched off by default, so you will need to go to Info Page > Settings > Sync and switch Cloud Sync ON.
 iStudiez Pro Settings
 Sync Settings
- Hint:
-
Once you create your Cloud Sync account your data will be pushed FROM server every 5 minutes of inactivity when iStudiez Pro is running. When you edit some data it will be pushed TO the Cloud Sync Server automatically.
To sync manually just shake your iPhone or tap Sync button on your iPad.
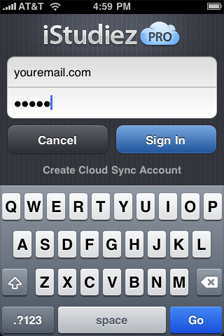
2. Create your Cloud Sync Account
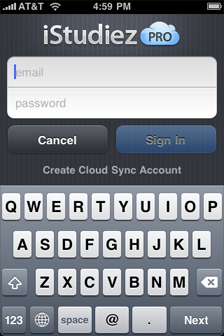
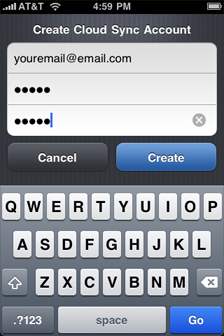
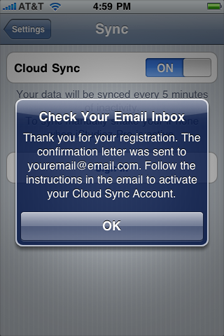
When you switched on Cloud Sync option you will need to Sign In. To Sign In you need to have Cloud Sync Account. Right there in Settings tap Sign In > Create Cloud Sync Account and then enter your email as a login and password that you would like to use to sync data to the Cloud Sync Server. After you submit your email and password, a confirmation letter will be sent to you. Follow the instructions in the email to activate your Cloud Sync Account. After your account is activated you can Sign In.
 Cloud Sync Sign In
 Create Cloud Sync Account
 Alert when account has been created
- Note:
- IF YOU NEVER RECEIVED CONFIRMATION LETTER double check your spam folder, wait a little bit longer, try again with the same email or try with another email address.
3. Login to your Cloud Sync Account
During your first cloud sync session you will be asked which data you would like to use.
Sync From This Device - your data will be loaded TO the Cloud Sync Server.
Sync From Server - you will need to choose this opt if you previously synced any data to Cloud Sync Server from any other of your devices, and if you wish the data from Cloud Sync Server to be loaded to this device.
 Cloud Sync Sign In
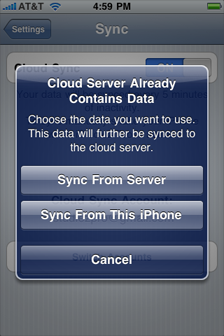 Choose the data you want to use
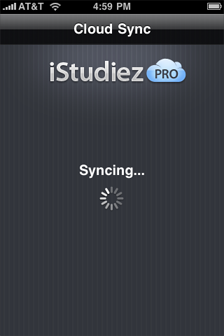 Sync is in progress
- Note:
- If you choose Sync From Server please be patient as first sync session might take up to 15 minutes, it depends on the volume of data to be synced.
4. General Issues
To sync manually on iPhone/iPod Touch simply shake your device. To sync manually on iPad tap Sync button in Overview.
Once you set up and confirm your Cloud Sync Account, you can see your last sync session date and time in iStudiez Pro Sync settings.
If for any reason you doubt whether Cloud Sync is active and working, go to Info Page > Settings and check the color of Sync icon: blue icon means Cloud Sync is working normally.
 iStudiez Pro Settings
 Sync Settings